

Heat Treat Radio #42: Justin Rydzewski on CQI-9 Rev.4 (Part 1 of 4) – Pyrometry
 Heat Treat Radio host, Doug Glenn, begins a 4-part series with Justin Rydzewski about Revision 4 of CQI-9. Having served on the 4th revision of CQI-9, this expert is full of interesting information and practical advice on how to understand and comply with CQI-9 Rev.4.
Below, you can either listen to the podcast by clicking on the audio play button, or you can read an edited version of the transcript.





Click the play button below to listen.
The following transcript has been edited for your reading enjoyment.
Doug Glenn (DG): Today, we’re beginning a new four-part series on the latest revisions to the CQI-9 specification. If you want to learn more about this series or related content, stick around ‘til the end of this episode.
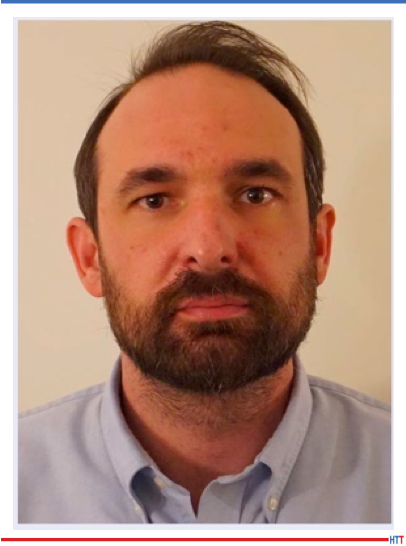
We’re here with Justin Rydzewski who is the director of sales and marketing at Controls Service, Inc. in lovely Livonia, Michigan. At least, this time of year it’s still lovely, right?
Justin Rydzewski (JR): Yes, we’ve got a few weeks left, I think.
DG: Justin is involved with the new revision of CQI-9. First off, I want to welcome you. Thank you so much for joining us on Heat Treat Radio. If you wouldn’t mind, let’s give listeners/readers just a sense of who you are and what your qualifications are to talk about CQI-9 and a little bit about Controls Service.
JR: I am the director of sales and market development for Controls Service. I got my start with this company around 2009/2010 working just as a sales rep, making phone calls and quoting work. Around 2010, the then president of the company was making a presentation to the AIAG, the Automotive Industry Action Group, the organization that publishes CQI-9, regarding their standard CQI-9. We had some questions and concerns, and so they allowed us an audience. After our presentation, they inquired whether or not we’d be interested in assisting them with drafting the third edition. We obviously said yes. I indirectly helped support at that point, and then when the third edition was released, we started working on the next one almost right away. After the third was rolled out, it wasn’t too long before the fourth edition meetings started, and then I began participating in a support role, and finally as a full blown participant at the end. The fourth edition took about 8 or 9 years to complete. It’s was an involved process, but it was fun. I learned a lot, and I’m proud of what we’ve been able to kick out.
As far as Controls Service is concerned, we’re an accredited calibration laboratory. We provide various on-site calibration and pyrometry testing services within the metro Detroit area, northern Illinois, Indiana, and Ohio.
DG: According to your website, the company is an ISO/IEC 17025 accredited provider of process control systems, calibration, maintenance, and services. Just to be clear, you were, in fact, fully engaged in this Revision 4. It wasn’t that you were standing on the sidelines; you were on the committee doing the work.
JR: Yes, I, myself. The president of the company was heavily involved with the third edition, so he was firsthand in the trenches on that one. My participation was directly hands-on with the fourth edition.
DG: The point is, you can speak with a good bit of authority, and that’s great. You’ve hit on it, but give us information again on CQI-9. Give us a brief history. When did it start? Who owns it? Maintains its update? To whom does it apply? And what’s its scope?
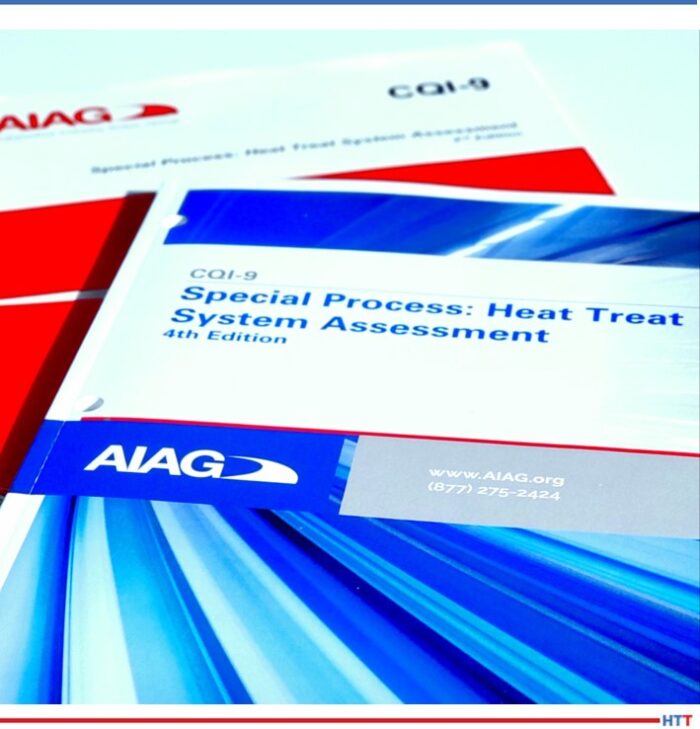
JR: The best way I know to describe it, because perhaps the most widely known pyrometry specification is AMS2750, is CQI-9 is the automotive equivalent of AMS2750. There are obviously some differences between the two documents, but, in a nutshell, that’s the comparison. It is a document supported by the AIAG, the Automotive Industry Action Group. They oversee the publication of it, the drafting of it, and supervise the whole thing through that process. CQI-9 is the number. Officially, I think it’s called the Special Process Heat Treat System Assessment and that kind of gets the nomenclature of CQI-9 that applies to automotive heat treaters, or any performing heat treat work within the automotive industry; and several processes fall into that category. It can be from commercial heat to in-house heat treat, to organizations like mine that support. It applies to anyone participating in that effort of heat treat.
DG: Let’s talk about Rev 4. You said as soon as “3” was out, you started on “4” and it took 8 – 9 years to get done with “4.” What was the main reason why you needed to abandon “3,” if you will?
JR: They schedule these things out to be rewritten on a routine basis. Like most specifications, they are reviewed on some established interval of time. When the third edition came out, the biggest difference between the second edition of CQI-9 and the third edition was that the third edition removed all references to AMS2750. When 2750 was in the document, it created a world of confusion, and the guidance and errata sheets that followed were just so numerous that they made it a somewhat difficult document to adhere to. One of the ideas we brought to the table was that maybe we should just remove all reference to it [2750] and write our own specification. So, the third edition removed the 2750 references. In doing so, it ended up being a very well written document. It was effective. The OEMs – your GMs, Fords, FCAs – were happy with the results of the document. The prolonged active interval of that document allowed us to collect a lot of really good data about what was working, what wasn’t, what was confusing, and where additional clarity was needed. The more data we collected, the more confident we were that the fourth edition would truly make a stride toward being a more effective document. It was longer than what we would have probably prepared for – in terms of that interval of review – but I think, all in all, the result shows for itself that it is better than it was.
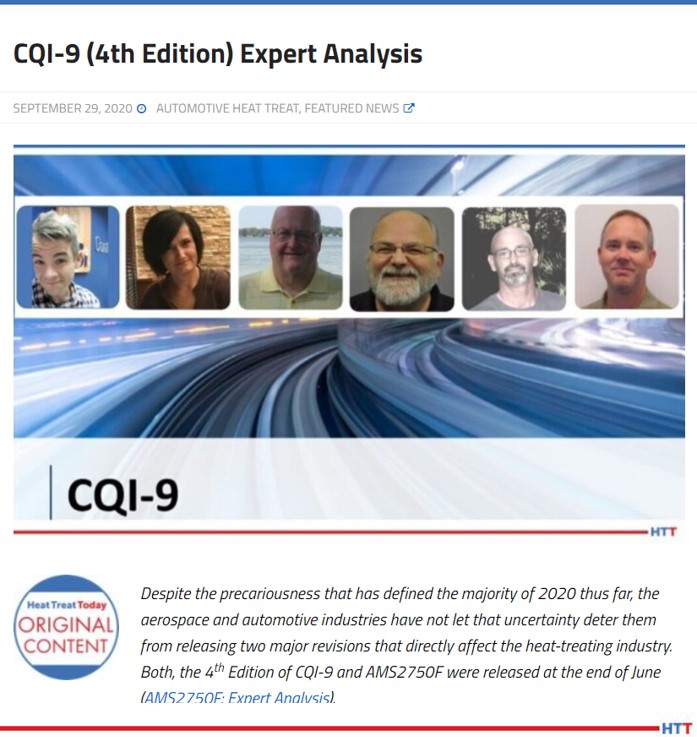
DG: You would say this Rev 4 is a major revision? Or is it just minor?
JR: The way the drafting process works is that you get all this feedback from the industry and review it. Everyone who participates in that work group brings their notes about things they noticed or things that they would like to see different; then we compile all of those notes together, review it, and establish a charter that drives every effort thereafter. The major items on our charter was to increase clarity and guidance, simplify, and make it easier for the end user to adapt. Largely, the changes within the fourth edition are towards that primary focus of our charter.
There are a lot of things in there that are different, but the difference there was merely to try to make it more clear: adjust syntax of a sentence, use a different choice of words, etc. One of the things I’ve learned in this process is that this document, while it might be clear as day in English, when it translates to German, it’s not. Or, when it translates to a different language, whatever the language, it’s not as clear; so, when you find out what it says in the other language, you say, “Hey, that’s not what we meant to say. We’ve got to think of another way to say it.” Largely, the changes are to increase clarity, but there are some real big changes in that effort. Like the heat treat assessment questions. The formatting was completely revamped, we changed that up dramatically, expanded it in some instances, and removed some that were redundant in terms of requirements.
So, there are some big changes, but, for the most part, it was an effort to enhance the clarity. It’s not a complete rewrite, but it is a different document.
DG: Substantial enough that people need to pay attention. You and I have talked in the past about the addition of a number of process tables. Wasn’t there a lot added there?
JR: There was one process table added to the primary document and it was Process Table I, which is regarding hot stamping. Process Table I technically existed in the third edition of the document. It was issued as an errata sheet in 2014, three years after the third edition, but it was never part of the primary document, so issuing it as an errata sheet had its complications. Not only did you have to make sure that the end user was aware of the document requirements, they had to be aware that there was an errata sheet also available to them, and this complicated things. It was very frequent for me to be out in my travels and talk to customers that were performing hot stamping that would say, “Well, it’s tough to tell what requirements in CQI-9 apply to us because we don’t have a process table.” Well, yes you do, actually; it’s an errata sheet. That caused frustration because, again, most people want to adhere to the requirements– they just want to know what the requirements are. When they don’t, it’s frustrating.
DG: For those who might not know, or have not been baptized into CQI-9 in the past, what are the major sections? Can you break it down into the three or four major sections and a very, very brief description of those sections?
JR: It is structured very similar to the way of AMS2750 in that regard. You have four sections that divvy up a pyrometry section: thermocouples, instrumentation, system accuracy testing and temperature uniformity survey. But, unlike AMS2750, CQI-9 is a system assessment, it is a process, it is a heat treat management system. It encompasses more than just pyrometry. Where AMS2750 is a pyrometry specification, CQI-9 is a process specification; it encompasses everything. It also includes your heat treat system assessment, which is three sections of questions regarding your heat treat operation, then you have your pyrometry which is those four sections I mentioned. Then you have your process tables. Your process tables drive all of your requirements for your particular operation, in terms of frequencies and tolerances.
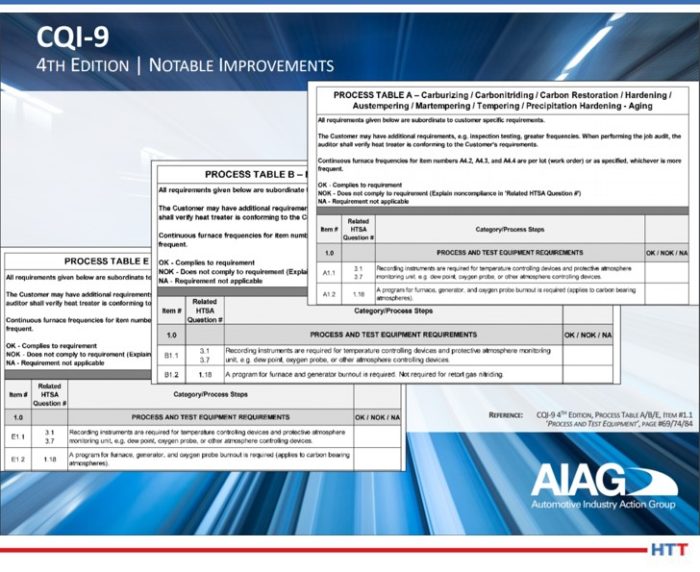
DG: Let’s jump into the section that, I think, you would probably say you’re most comfortable with- the pyrometry section. You mentioned in that section there are four subsections. Let’s run down through those. I’d like to do two things. First, let’s just talk about, very briefly, what are the major changes in each of those four sections and then let’s come back and revisit each of those sections with maybe some very practical advice. Let’s talk thermocouples first; that’s the first section.
JR: The thermocouple section had a fair amount of changes made to that portion of the document, but again, they were mostly for the clarity aspect of things. I would say, from a significant standpoint, one of the things that we had in the third edition that was rather confusing was in regards to grace periods. The only area in which a grace period was stated within the third edition was within the thermocouple section, which is funny because it doesn’t apply to thermocouples, in terms of CQI-9. It applies to instrumentation and system accuracy tests, and so that portion was removed and placed into a more appropriate area within the document.
Another aspect of it was the requirement for the calibration report to include an accreditation symbol. It was already a requirement that if the thermocouples were calibrated by an outside provider or third party, that they had to be accredited. But one of the areas that that doesn’t address is that if I am an accredited calibration laboratory, and my scope includes instrument calibration, whether it be for measure or source, it doesn’t necessarily mean that I’m accredited to perform a thermocouple calibration. So, instead of trying to overcomplicate the document and write something that says that the calibration that I’m performing on the thermocouple has to be included on my scope and create something more difficult than it has to be, we decided to just establish that the accreditation symbol needed to be included on the report. Also, as an accredited lab, I can’t place that symbol on a report for calibrations that aren’t part of my scope. It kind of allows that portion of the industry to self-police a little bit. That was one of the more significant changes.
Another one was that we made some adjustments to the usage side of things. There was a requirement – in lieu of tracking uses of nonexpendable thermocouples – which allowed you could to put a nonexpendable thermocouple in use for a duration of time, and you could have unlimited uses essentially for that duration, and then you could remove it from service at that point. However, that duration of time was absent of some critical information, that being, for usage of the elevated temperatures. In the usage table, it was 90 uses for over 1800 degrees and 180 for under 1800 degrees, and you had 6 months for a placement interval. That didn’t necessarily convey what we were trying to do, so we added some usage in there for the nonexpendable for over that 1800 degree mark.
We also included RTDs. I come across them, but just because of the temperature range that most of the processes within the automotive heat treat world are operating RTDs are necessarily applicable. But, they exist and a common approach that I would come across at least, was “well, they’re not included, so I don’t have to do anything.” So, we just included them to wipe that off the board, and now we know that any sort of temperature sensor is critical to address, if that portion of the process is temperature critical.
We added some caveats around resident thermocouples and their usage, which, in the previous one, were only allowed for comparative method SAT. We added some caveats for requirements when they’re used for probe methods within the realm of CQI-9.
DG: Before we go on to the next section which will be calibration, let’s back up just for a half a second. You and your team actually did a rollout webinar. Can you briefly tell the listeners where they can find a little more thorough description of the rollout on this thing, because we’re not going to cover all the details here, obviously.
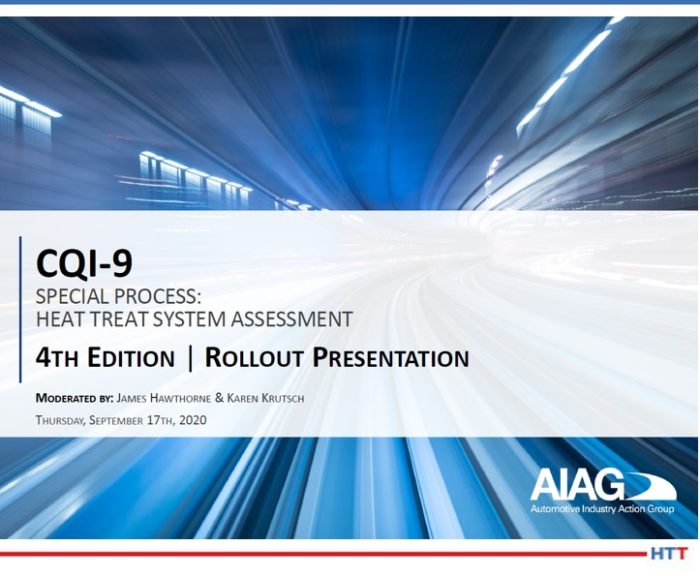
JR: Yes. It would be really tough to dive into everything; some of the changes are so insignificant, that it’s not worthy of discussion, really. The AIG’s website has a page assigned to automotive heat treat and on that page they have some links to different content that we produced for that rollout presentation back in mid-September. There is also a page 3 of the document itself which outlines the majority of the changes, (at least the significant ones), made within the fourth edition. So there is a list, 3 ½ pages long, of the different changes made. There are summaries of those changes that exist in several different places, but one of them being the document itself.
DG: Did you not do a webinar? Is there a webinar? Can people actually see the webinar?
JR: I’ve not seen the webinar posted yet, I’ve not checked in a little while, but the intent was to post a version of that webinar.
DG: In our transcript of this podcast, we will look for it first off, and if we find it, we will put a link to it when we put this online. So if you’re listening and you want to see that webinar, if it’s out there, we’ll put the link in.
OK, let’s move on then, Justin, to the second of the four pyrometry sections which is calibration. What were the major changes?
JR: Again with reporting, the reporting requirements for calibration are updated; they are different. There are some minor revisions to the requirements for the calibration report. Those sort of things can be easily overlooked, so I wouldn’t ignore that. They are different. The biggest, perhaps most significant difference within the instrumentation section is that in June 2023, all control monitoring recording instrumentation must be digital. It is very similar to the approach taken by 2750 in removal of analog instrumentation, CQI-9 as well, is going to follow suit there, as well. [Listen to the AMS2750F episode with this update here.]
DG: I think AMS is by 2022, so you guys are an extra year, but nonetheless, you’ve got to start getting away from analog over to digital.
JR: For the most part, that’s the biggest change within the instrumentation section.
DG: Let’s move on to system accuracy tests.
JR: Within system accuracy tests, again reporting requirements are updated. They include some new requirements there. The illustrations within the system accuracy test section have all been updated and revamped. I believe the old ones, that were in the third edition, were very similar in nature to the illustrations that were included in AMS2750 C, so they were well overdue for an update. We cleaned those up. We removed nonessential information just to make it clear what it is we’re actually discussing there.
Also, we established grace periods that are specific to each method of system accuracy test. There are three different accepted methods for SAT within CQI-9- probe method A, probe method B, and a comparative method, and we established grace periods for each of those individually so that it’s clear and not an assumed grace period.
DG: And grace periods being, for example, “Well, the due date falls on a holiday, how many days afterwards do I have?” That type of thing?
JR: Yes. If my system accuracy tests were due on a Friday, let’s say they’re due on the 1st, technically. I don’t lose my compliance on that system from a system accuracy test standpoint for x period of days after the fact. It’s to allow for, like you said, a weekend coming up, a holiday coming up. You can still maintain your compliance interval without having to shut everything down and start fresh. A practical application would be, say you order some test thermocouples and they’re delayed. So now, all of a sudden, you don’t have the test materials that you need to perform the task, or your instrument that you sent out for calibration got delayed and it’s not back yet. Those uncontrollable sort of events don’t prevent you from operating.
DG: The final section under pyrometry would be temperature uniformity surveys. Any major changes there?
JR: There were a few. First, the reporting requirements are now different; they’ve been updated. They include some new things. Perhaps most notable is the requirement for when you perform a test on a semi-continuous or continuous system to indicate the soak time required versus soak time achieved. That has to be included on the report. Technically, it probably should have been there for the third edition as well, since one of the requirements is that you have to have obtained your desired soak time. This just calls it out to the forefront and makes it a bit clear. That information of the report makes assessing that aspect of things a bit more simple.
We added a specific grace period for temperature uniformity surveys so that it’s clear, it’s not assumptive. Where I’ve seen it most often is within the hot stamping world. You have a single stack furnace with multiple individually controlled chambers that are all separated by insulation or wall or some sort of means of differentiating them, so that they’re all essentially individual furnace cavities. We added in some clarity to say that it’s not good enough just to test one of those chambers, you need to test all of them, because they all can be different.
[blockquote author=”Justin Rydzewski ” style=”1″]Perhaps the most significant change within the temperature uniformity survey section is to the alternative temperature uniformity survey testing methods.[/blockquote]
Perhaps the most significant change within the temperature uniformity survey section is to the alternative temperature uniformity survey testing methods. In instances when I can’t perform a survey with sensors being trailed in, or I can’t send a data pack sort of unit or a PhoenixTM unit through that furnace system itself to collect the data, for systems like that, in the third edition, there were three or four paragraphs of information about what you could do. It was not entirely clear what other aspects of the section applied, what reporting was required, what sort of procedures needed to exist, and so you found a lot of variance in that testing practice. A lot of times, I’d have customers that say, “I don’t know how to perform a TUS on it, or I don’t think that I can, or it’s not practical, so I guess I don’t have to do anything.” And that’s not proper. It wasn’t clear that these surveys applied in instances where you couldn’t do the other, like a traditional TUS. So that whole entire section got rewritten from ground up to include a structure that is very similar to the other aspects of that TUS section, structured in the same way, in terms of data collection, when you need to perform the tests, these alternative tests like property surveys and whatnot, the procedure that needs to exist, what needs to be included in the procedure, and what needs to be included in the reporting. Basically, just more clear guidance so that in those instances where a survey can’t be performed, the heat treater at least has a degree of confidence that what it is they are going to be doing is going to be up to snuff, that it’s going to pass muster with their auditor.
DG: I want to go back and go all through those four sections again and ask you the same basic question for each of those four sections. When your company, or companies like yours, walk into a prep for an audit situation, what are the things that you’re seeing, practically, on the thermocouple end of things, the calibration end of things, the SAT and the TUS? Let’s start with the thermocouple: When you walk in, what do you most often see and what do you tell people?
JR: When I first walk into a facility, one of the first things I’m looking for is how the flow down of information is conducted. How are they approaching the flow down of information? Because, in order for me to assess whether or not you’re compliant with the document, I need certain bits of information. And it’s not just me, anyone would need it. As I go through a plant, and I’m looking for information on thermocouples, I want to know when the thermocouple was installed, I want to know if it was calibrated, what’s the number of the calibration certificate that it ties back into, what’s the location of that thermocouple and where it’s installed, what’s its purpose? I can tell you that often it happens where I ask, “What’s this thermocouple?” “Well, that’s my control thermocouple.” “Are you sure?” “Yes, I’m sure.” Then, when you go to remove it, it turns out to be the high limit. There are these little things where people ask, “Well, what’s it matter if one is a control or one is the high limit?” Especially if they’re both in the same well and it’s a dual element sort of thermocouple. It’s important for a multitude of reasons. If you don’t know that basic sort of information, or you don’t find that information to be important, what other information won’t you find important? It becomes like a mentality aspect of things. I like seeing that sort of information available and ready, that you don’t have to go digging for it. So, that’s the first thing I look for any time I walk in a plant. More often than not, I find that aspect of things can be lacking, from a documentation standpoint, from an availability of documentation standpoint, or “Can I see the calibration certificate for this specific thermocouple?” and I get, “Well, here are all of my certificates.” “Well, which one applies to that thermocouple?”
What I also try to convey is that the more difficult that you make this for me – for someone who’s coming out to audit you or to perform this assessment to check on you – the more difficult you make it, the harder they’re going to start scratching. You want this to be easy. You want to convey confidence. You want to convey the repeatability of things. I can’t stress enough strong documentation and great documentation systems for easy recall, like availability of information at the actual thermocouple itself is such a nice convenience, and when someone sees that, it conveys confidence. Outside of just a basic compliance issue, it’s that support system for thermocouples, because everything starts there. All of it starts there. Even from the basic things like knowing what it is you have there, from a thermocouple aspect.
With one of my closer customers in our first interaction together, he called and asked for a 30” long thermocouple and to just make sure that it’s type K. “Well, I need just a little bit more information than that. What else can you tell me about it?” “That’s all I have. Just get me one.” “Well, I have a binder on my desk that’s an inch and a half thick and every thermocouple in there just about matches your description. I need more. Should I just flip a page and pick one?” There are a lot of variants that can exist there and when you introduce variants, you have an opportunity to introduce variance in your performance of that system.
So, consistency, repeatability, and assuring those things on a perpetual basis is critical. Things like insertion depth, length, diameter, type, calibration, where you have it calibrated. All of those things should be documented and standardized and that documentation should be readily available to anyone who needs it so that you can ensure that you’re replacing like with like, what was there before, if it was compliant, and what you replace it with is also compliant. The performance that you had on that system on day 1 versus day 180, you want to be able to assess that variance in performance, not based on the variables that have changed, like are they new thermocouples, are they in new locations; you want to assess it in terms of those other exterior factors. That’s why you call out thermocouples instrumentation and the like within pyrometry and CQI-9. Those things, to me, are really important, and they’re the first things that give that indicator of what things are going to be like as I go through a job site initially.
DG: Anything else under thermocouples, or should we move on to calibration?
JR: That pretty much covers it. From a thermocouple standpoint, just ensuring that you have solid documentation surrounding those things. It can be an overlooked piece of equipment, but they are so incredibly critical.
[blockquote author=”Justin Rydzewski ” style=”1″]From a thermocouple standpoint, just ensuring that you have solid documentation surrounding those things. It can be an overlooked piece of equipment, but they are so incredibly critical.[/blockquote]
DG: Right. And be able to easily access it and instill confidence in the auditor so that they know you know what’s going on.
Let’s move on to calibration then. When you walk into some place and you’re going to check their calibration processes and whatnot, what do you see usually?
JR: Especially when a new edition comes out, or a newer revision of a pyrometry specification, the first thing that I typically go there with is – again, similar to the thermocouple side of things – I want to look at documentation. If I have a new Rev, the first thing I’m going to ask is what are the new requirements for reporting? I want to know what was on the report yesterday and what needs to be different tomorrow, so that I can make sure from a documentation standpoint, I’m going to be covered, because that’s what I’m going to put in front of someone. That’s the thing they’re going to evaluate initially. And so, I want to make sure that this first impression is solid and that it checks every box that it’s supposed to. I’ll review all of the reporting requirements initially, just to make sure my reporting is going to pass muster with an audit. And I will scrutinize that thing up and down to the Nth degree, just to make sure that I’ve got it to a point where I’m comfortable with it. That’s where I typically start.
Again, similar to thermocouples, I want to make sure that I have a solid support system for my facility in terms of instrumentation. I know what instruments I have there, I know what’s required of all of them, I know where I want them calibrated, I know how I want them calibrated, I know where they operate, all of those sorts of things. I find often, especially on new job sites, an instrument and they’ll have offset in there. “Well, what’s this offset for?” “I don’t know.” “OK. What was it the last time you had calibrations? Has this changed? Is this a value that changes?” “I couldn’t tell you.” And sometimes, the level of offset there, it’s possible for it to be at a level that is not compliant with the document without that documentation to support it, without something calling out what it’s there for, what the intended purpose is of it. Anytime you have that “I don’t know” answer, or “It’s in someone else’s hands,” let’s say the provider of pyrometry services that are out there perform the calibration, they’re not aware that they have to go through some sort of approval process to change offset, pay the instruments out, I’m going to pump in some offset, and there you go. In the worlds of CQI-9, and especially within AMS, you can’t do that.
There is a right way to go about doing things, and a ladder of things to climb before you can just go ahead and jump. Having a solid foundation of understanding of your instruments, documenting the details of those instruments, and having that readily available. If you have that, the likelihood that you’re going to be compliant and have a favorable audit in terms of your instrumentation, is going to be so much higher than if you don’t. So, strong support system. Strong documentation as well.
DG: Let’s move on to the system accuracy tests.
JR: The system accuracy test is often something that we encourage our customers to take on themselves because it’s not an overly complicated process, by and large. From a third edition to fourth edition, again my first stop is at reporting. I want to make sure whatever it is the data I need to collect is going to be there at the end of the day and is going to be presented in a manner where anyone can understand at glance. I don’t have to have a training session on how to understand my reporting. I want it to be very clear, very forthright in terms of information that it’s clear. And then understanding the differences between the acceptable methods.
Probe method A in CQI-9 is most like the comparison method within AMS2750 where you have a test instrument system alongside your process instrument system and doing a comparative in terms of the calculated difference there. Understanding the math and the order of operations out there is essential. It is so easy to mess that up or forget how to do it properly. One of the benefits of the illustration within the fourth edition is that we made a very concerted effort to make sure that the means in which that math is performed is clear, and how it’s reported is clear, so that there’s no too much confusion. The goal here isn’t, “Aha, gotcha! You don’t know how to do an SAT.” The goal is that you do an SAT and that you do it in a manner that produces you with a level of confidence that you’re okay and that everything is going to have the best likelihood or repeatability and coming out as expected.
Understanding the math is also critical. The only real thing of note in the third edition that wasn’t explicitly called out, that in the fourth edition is explicitly called out, is that the SATs only apply to the control and monitoring and recording thermocouples; it does not apply to thermocouples that are dedicated to the purpose of over-temp protection. That can be a nice break for most users who were thinking that they had to do it in the previous edition.
For the most part I see that the act of actually performing it— again, that flow down of information becomes critical. If I know how long my thermocouple is, the process thermocouple is at that process thermocouple. Say, for instance, it’s identified on a tag at the thermocouple and it says it’s 40”. If I go insert my test thermocouple and it goes in 20” and I feel like I’ve bottomed out, the only indicator that I would have that I’ve not bottomed out my thermocouple and I’ve lined my measuring junctions, would be that measurement at the thermocouple, would be an indication of how long it’s supposed to be or an awareness of how long it’s supposed to be. If I don’t have that, and I drop my test thermocouple in and it feels like it bottomed out. Cool, they’re lined up. They could be dramatically different. In that case, I would go ahead and guess that you would notice that instantly as you’re failing that SAT, but an inch or two inches can make a significant difference in misalignment of junctions. Having an awareness of insertion depth of your process thermocouple, length of process thermocouple, and what’s required for insertion depth on your test thermocouple is critical to perform in that test and it’s something I see lacking often when I’m out in the field assessing how my customers are performing the tests in-house.
DG: And finally, let’s talk about what you’re seeing when you walk into a shop for temperature uniformity surveys.
JR: Uniformity surveys, again, the first thing I’m doing is assessing the reporting requirements to make sure everything is up to snuff, because that’s your first impression you’re going to convey to everyone. The requirements within the fourth edition are of note, that would require something to be done differently, for the most part, you’re going to be find them to be very similar. The thing that I’m looking for most is the repeatability of that test. How like is one test to the next one? What is your means of collecting data and what is your response plan when that data is unfavorable? Having that predetermined, so that you’re not doing in on the fly, can be incredibly helpful and it adds to expedite that process of getting good tests out of there.
[blockquote author=”Justin Rydzewski” style=”1″]How like is one test to the next one? What is your means of collecting data and what is your response plan when that data is unfavorable? Having that predetermined, so that you’re not doing in on the fly, can be incredibly helpful.[/blockquote]
One of things I’ve always recommended my customers doing is that before you perform that survey, have some sort of pre-survey list that you go through of tasks that you want to verify before that test is run, just to make sure that you’re collecting all the data that you need to collect before you perform it. In an instance where that test data is unfavorable, you can go back and take a look at it and compare it against previous tests performed and not have to be concerned about whether or not this test was performed differently than the one prior.
Consistency is the key. And again, strong documentation systems. Understanding what the operating temperature ranges are for each system, where your sensors are placed, how they’re traversed, where they’re installed at if it’s a continuous furnace. There are so many variables to performing that test, having a handle on them is incredibly important. Otherwise, the test data performed on day X compared to on day Y is a meaningless comparison, and you want that value to be there, to be able to compare them, so that you can see where performance has varied or where it’s different, and have something pointing at where you need to go investigate.
DG: Justin Rydzewski of Controls Service up in Livonia, MI, thank you very much. I think this is going to be our first. We’re going to have either three or four of these podcasts. I think next time, we’ll either deal with heat treat assessments or we’ll talk about the process tables some.
To contact Justin Rydzewski, go to www.controlsservice.com.

Doug Glenn, Heat Treat Today publisher and Heat Treat Radio host.
To find other Heat Treat Radio episodes, go to www.heattreattoday.com/radio and look in the list of Heat Treat Radio episodes listed.
Heat Treat Radio #42: Justin Rydzewski on CQI-9 Rev.4 (Part 1 of 4) – Pyrometry Read More »