

INDUCTION HEATING EQUIPMENT TECHNICAL CONTENT

Induction Heat Treat: Considerations for Inductor Design


Source: Fluxtrol.com

Induction heat treaters know that proper coil design is crucial to increasing longevity, improving production quality, and cutting costs. Among the topics addressed in this paper about induction heat treat coil design and fabrication (presented by R. Goldstein, W. Stuehr, and M. Blackby at ASM International) are these:

  • The design and fabrication of induction heating coils over the years
  • The Variable of Flow and the Influence of Frequency
  • Control and Presentation
  • Structure, Quenching, and Cooling
The paper closes out with a case study using computer simulation to show typical temperature distributions in a single-shot induction hardening coil.
A good place to start whenever preparing parts for induction heat treating is the consideration of inductor design. The authors provide this list (an excerpt):
[spacer color="264C84" icon="Select a Icon"]

Considerations for Inductor Design

Induction heat treating coils are available in many shapes and sizes and must perform a variety of tasks in a given induction heat treating application. Depending on the application, the induction coil design requirements include:

  • Meet heat treatment specifications in desired production rates
  • Be robust enough to tolerate manufacturing variations
  • Mount into the induction machine
  • Have electrical parameters that match the induction power supply
  • Deliver quench
  • Have a satisfactory lifetime
  • Have satisfactory efficiency
  • Be repeatable from inductor to inductor

In developing a new induction heat treating coil and process, the first question is whether the component will be produced on an existing system or if a new machine must be built. In many cases, the part producer’s desire is to develop new tooling for an existing machine with spare capacity. This reduces the degree of freedom and can make the induction coil design procedure more complicated because a less-than-optimal frequency or coil style will be necessitated to fit the existing machine (Ref 16).

To determine the ability to use existing equipment, it is necessary to make an analysis of the part to be heat treated. Part material, prior processing, geometry, production rate, and heat treatment specifications all play roles. The part material and prior processing determine what the minimum heat treatment temperature should be, along with how much time is allowed for cooling. The part geometry and heat treatment specifications indicate how much energy is required, what the preferred frequency ranges are, and what type of induction method (i.e., single shot, scanning) is best suited for the application. Finally, the production rate determines how much power and/or how many spindles or stations are required.

Read more: "Design and Fabrication of Inductors for Induction Heat Treating"


Induction Heat Treat: Considerations for Inductor Design Read More »

Dr. Valery Rudnev on . . . Equipment Selection for Induction Hardening: Single-Shot Hardening, Part 1

This article continues the ongoing discussion on Equipment Selection for Induction Hardening by Dr. Valery Rudnev, FASM, IFHTSE Fellow. Six previous installments in Dr. Rudnev’s series on equipment selection addressed selected aspects of scan hardening and continuous/progressive hardening systems. This post continues a discussion on equipment selection for induction hardening focusing on single-shot hardening systems.

The first part on equipment selection for continuous and progressive hardening is here. The second part in this series on equipment selection for single-shot hardening is here; the third part is here. To see the earlier articles in the Induction Hardening series at Heat Treat Today as well as other news about Dr. Rudnev, click here. This installment continues a discussion on equipment selection for continuous and progressive hardening applications.


Why Single-Shot Hardening?

With the single-shot method, neither the workpiece (cylinder shaft, for example) nor the coil moves linearly relative to each other; the part typically rotates instead.¹ The entire region that is to be hardened is heated all at once rather than only a short distance, as is done with scan hardening.

With conventional scan hardening of cylindrical parts, induced eddy currents flow circumferentially. In contrast, a single-shot inductor induces eddy currents that primarily flow along the length of the part. An exception to this rule would be the half-moon regions (also called the crossover or bridge sections) of a single-shot inductor, where eddy current flow is circumferential.

Normally the single-shot method is better suited for hardening stepped parts where a relatively short (1.5–2 in. [38–50mm] long heated area is commonly minimum) or moderate length area is to be heat treated. This method is also better suited to cylindrical parts having axial symmetry and complex geometry including various diameters.

When scanning these types of parts, improper austenitization of certain areas may occur due to localized electromagnetic field distortion, for example. Insufficient quenching due to the deflection of quench flow not allowing it to properly impinge on the surface in various diameter regions may also occur. Both factors are considered undesirable and can cause low hardness, spotted hardness, or even cracking. For example, the use of scan hardening on stepped shafts with large shoulders, multiple and sizable diameter changes, and other geometrical irregularities and discontinuities (including fillets, flanges, undercuts, grooves, etc.) may produce severely non-uniform hardened patterns. In cases like this, a scan hardening inductor or progressive/continuous hardening system would be designed around the largest diameter that would have sufficient clearance for safe part processing.¹ However, variations in the shaft’s diameter, to a significant extent, will result in a corresponding substantial deviation in the workpiece-to-coil coupling in different sections of the shaft, potentially causing irregular austenization.

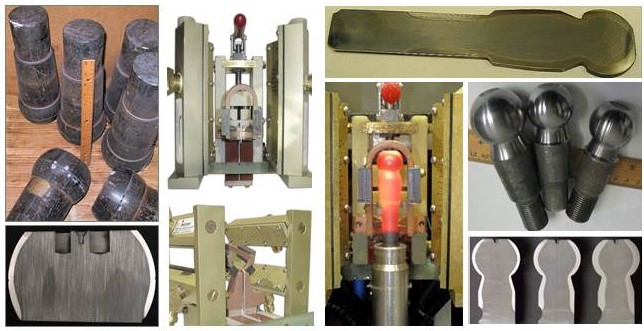
Besides that, sharp corners have a distinct tendency to overheat owing to the buildup of eddy currents, in particular when medium and high frequencies are used. The electromagnetic end and edge effects may also cause the shoulders to severely overheat while the smaller-diameter area near the shoulder (including undercuts and fillets) may have noticeable heat deficit. These factors may produce a hardness pattern that might grossly exceed the required minimum and maximum case depth range, making it unacceptable. Single-shot hardening is usually a better choice in such applications. As an example, Figure 1 shows some examples of components for which single-shot hardening would be a preferable method of heat treating.

Examples of components for which a single-shot hardening would be a preferable method of heat treating. (Courtesy of Inductoheat Inc., an Inductotherm Group company)


In some not so frequent cases, when hardening larger parts, there are advantages to the single-shot method over the scanning method, such as the reduction of shape/size distortion, enhanced metallurgical quality, and increased production rate.

Single-shot hardening may also be the preferred choice when shorter heat times/high production rates are desired. For example, in some applications, the time of heating for single-shot hardening can be as short as 2 s, though 4 to 8 s is more typical.

However, the single-shot method has some limitations as well. One of them is cost. Single-shot inductors are typically more expensive to fabricate compared to the coils used for scanning. This is because the single-shot inductor, to some degree, must follow the contour of the entire region required to be heated. Additionally, a single-shot inductor is usually able to harden only one specific part configuration, whereas a coil used for scanning may be able to harden a family of parts.

Besides that, in some case hardening applications using a scanning method, it is possible to apply certain pre-programmed pressure/force on a workpiece during heat treating. This allows distortion to be controlled. Single-shot hardening might also permit applying this technique but there might be some limitations.

Design Features of Single-Shot Inductors

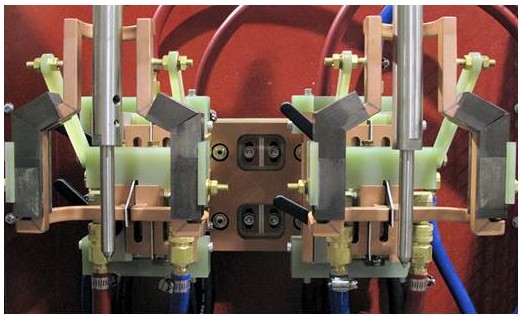
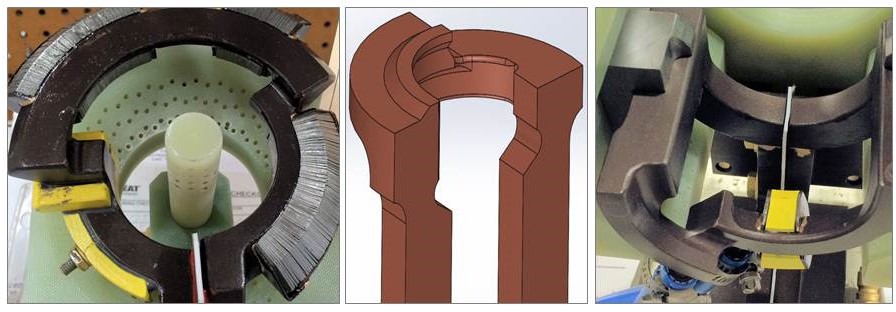
Single-shot inductors are made of tubing, either 3-D printed or CNC-machined from solid copper to conform to the area of the part to be heated. This type of inductor requires the most care in fabrication because it usually has an intricate design and operates at high power densities, and the workpiece’s positioning is critical with respect to the coil copper profiling. Figure 2 shows several examples of induction heating of different components using single-shot inductors.

Several examples of induction heating of different components using single-shot inductors. (Courtesy of Inductoheat Inc., an Inductotherm Group company)


In order to provide the required temperature distribution before quenching, heat is sometimes applied in several short bursts (pulse heating) with a timed delay/soaking between them to allow for thermal conduction toward the areas that might be difficult to heat.

Single-shot inductors typically require higher power levels than used in scan hardening because the entire area of the workpiece that needs to be hardened is austenitized at once. This is the reason why single-shot hardening normally requires having a noticeably larger power supply compared to scan hardening, resulting in increased capital cost of power source. Additionally, the increased power usage and power densities combined with complex geometry can reduce the life of the inductor. For this reason, single-shot inductors often have shorter lives than scan inductors.

It is always important to keep in mind that, electrically speaking, the inductor is typically considered the weakest link in an induction system. For this reason, most single-shot inductors have separate coil-cooling and part-quenching circuits. The inductor will fail if power is increased to the point at which the water cannot adequately cool it. Additional cooling passages may be needed with high-power density, single-shot inductors. A high-pressure booster pump is also frequently required.

The next several installments of Dr. Valery Rudnev on . . . will continue the discussion on design features of single-shot inductors and equipment selection.


References

  1. Rudnev, D.Loveless, R.Cook, Handbook of Induction Heating, 2nd Edition, CRC Press, 2017.


Dr. Valery Rudnev on . . . Equipment Selection for Induction Hardening: Single-Shot Hardening, Part 1 Read More »

Induction Heating System Improves Motor Production

The parent company of a U.S.-based induction heating equipment manufacturer was selected to supply an induction heating system to an international fan manufacturer, replacing their aging heating system with a UNI HEAT system.

Elektror, headquartered in Ostfildern, Germany, purchased the induction heating system from EMAG eldec, the parent company of eldec LLC, a heating equipment supplier in Auburn Hills, Michigan. Elektror has two production sites in Waghäusel, Germany, and Chorzów, Poland, and creates industrial fans and side channel compressors. The Waghäusel site, which manufactures nearly 250 devices a day, purchased the UNI HEAT from EMAG eldec in hopes of achieving precise induction heating of motors for their fans.

Induction heating is used to manufacture the electric motors that drive Elektror’s fans and side channel compressors by combining the empty stator housing and the motor winding. To achieve this, the housing is first heated to a temperature of 280 to 300 degrees Celsius. This causes it to expand and allows for the motor winding to be inserted. Once they have cooled down, both components establish a form-fitting and solid bond. Although Elektror used the joining process previously, their former induction heating system was in need of improvement. For instance, it did not indicate the component’s actual temperature after heating, which led to extended throughput times when joining the empty stator housing and the motor winding. The company hoped to improve this process and make it more reliable.

Roland Sand, head of the production team at Elektror, found Emag Eldec with an Internet search for potential suppliers that would have the required expertise and proximity to Waghäusel to deliver timely service. His company then visited the EMAG eldec site in Dornstetten and discussed the project. “In the end,” he said, “it was EMAG eldec’s extensive experience with induction turn-key solutions that convinced us.”

Roland Sand (2nd from left) with colleagues at Elektror and a representative from EMAG eldec (Source: EMAG eldec).

The two companies collaborated on subsequent development of the UNI HEAT system. They worked out details regarding the control unit, safety, and the design of the new comprehensive solution, including a modified induction heating process. To ensure precise heating results, they set an induction rod to plunge into the hollow component rather than using a ring inductor, which enclosed the component from outside.


They implemented several steps to develop process reliability. First, the operator places the empty housing in the custom-fit workpiece carrier and pushes it inside the UNI HEAT. As soon as he closes the front door, the first mechanical processes are initiated in the machine; the component is lifted and encompasses the inductor when it reaches its processing position. The actual induction heating then only lasts 30 to 120 seconds depending on the size of the housing. When complete, a warning light signals to the operator that the component can be removed. The actual component temperature is continuously shown on the operator panel.

The operator then places the hot housing on a mold, which is ready at the cooling location. He pushes the motor winding from the top into the housing. The component is cool in approximately two minutes and then placed on a conveyor belt.

The machine undergoes many retooling processes, because Elektror produces a variety of motor sizes, and sometimes the batches change several times a day. The process is brief; the operator loosens two screws on the inductor mount, removes the inductor and attaches one of six different inductors for the various empty housings. The workpiece carrier is simply set down and can be changed easily in a few seconds. The program on the operator panel can be set in just a few clicks, which completes the process.

Induction Heating System Improves Motor Production Read More »

Dr. Valery Rudnev on … Equipment Selection for Induction Hardening: Continuous and Progressive Hardening, Part 3

This article continues the ongoing discussion on Equipment Selection for Induction Hardening by Dr. Valery Rudnev, FASM, IFHTSE Fellow. Dr. Rudnev previously reviewed equipment selection for scan hardening in three parts. The first part on equipment selection for continuous and progressive hardening is here; the second part is here. To see the earlier articles in the Induction Hardening series at Heat Treat Today as well as other news about Dr. Rudnev, click hereThis installment continues a discussion on equipment selection for continuous and progressive hardening applications.


Inductor Designs

So far, I have discussed the application of conventionally designed solenoid coils in continuous/progressive hardening applications. However, even multiturn solenoid-type coil geometries may have quite complex shapes accommodating the shape of induction hardened components. One illustration of this is shown in Figure 1 where two in-line multiturn solenoid-type inductors are used for heat treating of an irregular shape component.

Figure 1. Two in-line multiturn solenoid inductor of a complex shape. (Courtesy of Inductoheat Inc., an Inductotherm Group company)

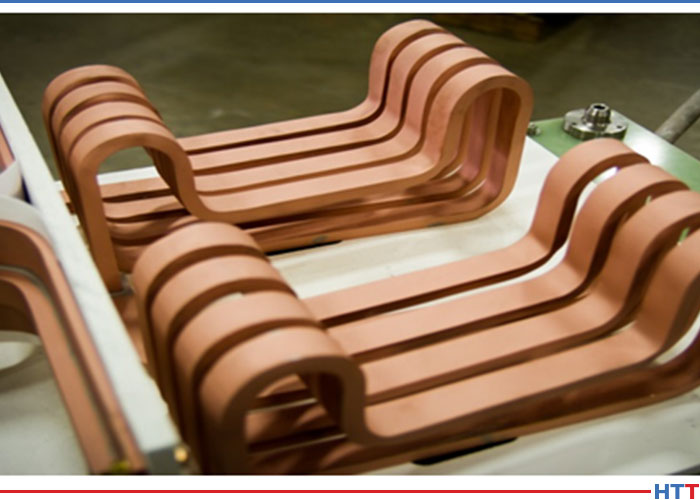
Besides multiturn solenoid coils, channel-type multiturn inductors (also called slot or skid inductors) are frequently used in continuous/progressive heat treating. The channel inductor gets its name from its similarity to a long channel. This shape allows parts to be passed through the coil in a number of ways, such as a conveyor, shuttle, indexing, rotary or carousel table, turntable, or any other indexing system.

Channel coils permit easy entry and exit of the heated components to/from the inductor. Figure 2 shows images of some examples of multiturn channel inductors. The crossover ends of channel coils are bent away to allow the part to pass through. In some cases, the crossover ends are made high enough to ensure minimum impact on the heating of the part at the ends of the coil, minimizing electromagnetic forces when workpieces enter and exit the inductor. In other cases, the opposite might be true, and crossover coil regions play an important part in providing the needed temperature distribution.

Figure 2. Images of different examples of multiturn channel inductors. (Courtesy of Inductoheat Inc., an Inductotherm Group company.)

Channel coils are used to heat treat selected regions of parts, as well as entire components. These inductors are often used for through hardening, annealing, and tempering applications. However, if a specific case depth is required, rotation of the workpiece may be needed to even case depth.

Figure 3 shows a “state-of-the-art” continuous fed induction system for heat treating fasteners [2]. This system is adjustable for a wide range of fastener/bolt diameters and lengths (0.5–4.0 in. [12–102 mm]) and is capable of production rates of up to 600 fasteners per minute. The unique proprietary coil design developed by Radyne Corporation maximizes electrical efficiency and system flexibility while preventing stray heating of electrically conductive surroundings that may potentially cause undesirable heating of structures and malfunction of electronic devices. The rotary dial tooling is designed to accept bolt fasteners from the in-line vibratory feeder. The adjustable speed rotary table contains advanced safety features to prevent damage and meltdown.

The quench assembly allows adjusting the quench flow for the utmost in quench control. After spray quenching, parts are stripped from the traverse assembly and dunk quenched into the tank for final cooling to room temperature.

Figure 3 shows a “state-of-the-art” continuous fed induction system for heat treating fasteners [2].
The tooling is designed with a quick change feature to ensure that all tooling can be changed for a different part size in less than 15 minutes. The system is controlled through a controls package and HMI for part setup and part storage of different programs. Through this HMI, the power source coil “Z” adjustment can also be stored and adjusted for different bolt lengths assuring superior quality fasteners. This unit includes four sizes of tooling required for the rotary heat treat fixture and the traverse tooling: M6, M8, M10, and M12.

Besides solenoid coils and channel inductors, other inductor styles are used including split-return, hairpin and double hairpin inductors, transverse flux, and traveling wave inductors. However, an application of those inductors is not as frequent for continuous/progressive induction hardening.

References

  1. V.Rudnev, D.Loveless, R.Cook, Handbook of Induction Heating, 2nd Edition, CRC Press, 2017.
  2. J.Mortimer, V.Rudnev, Bernhard,A., Induction Heating and Heat Treating of Fasteners, Fastener International, February, 2019, p.50-53.

Dr. Valery Rudnev on … Equipment Selection for Induction Hardening: Continuous and Progressive Hardening, Part 3 Read More »

Dr. Valery Rudnev on . . . Equipment Selection for Induction Hardening: Continuous and Progressive Hardening, Part 2

This article continues the ongoing discussion on Equipment Selection for Induction Hardening by Dr. Valery Rudnev, FASM, IFHTSE Fellow. Dr. Rudnev previously reviewed equipment selection for scan hardening in three parts. The first part on equipment selection for continuous and progressive hardening is here; the third part is here. To see the earlier articles in the Induction Hardening series at Heat Treat Today as well as other news about Dr. Rudnev, click here


Frequency Selection

Depending on the application specifics, continuous and progressive hardening lines may use the same frequency for various in-line coils. In other cases, power levels and frequencies may be different at different heating positions. The presence of three general process stages (described in Part 1) makes a marked impact on a selection of process parameters and the design of an induction system.

When using different frequencies for the various heating stages, the coil design may need to change as well (e.g., a number of coil turns may need to be adjusted for load matching purpose). Just as the eddy current penetration depth in the heated part is affected by the frequency, the current flow in the inductor is affected as well. The wall thickness of the inductor turns (i.e., copper tubing wall) might need to be adjusted to accommodate different frequencies to maximize the coil electrical efficiency.¹

The wall thickness of an inductor’s heating face should be increased as frequency decreases. It is highly desirable for the current-carrying copper wall thickness to be 1.6 times greater than the current penetration depth in the copper (δCu). Increased kilowatt losses in the copper, which are associated with reduced electrical efficiency and greater water-cooling requirements, will occur if the wall is thinner than 1.6∙δCu. In some cases, the copper wall thickness can be noticeably thicker than the recommended value of 1.6∙δCu. This is because it may be mechanically impractical to use a tubing wall thickness of, for example, 0.25 mm (0.01 in.).

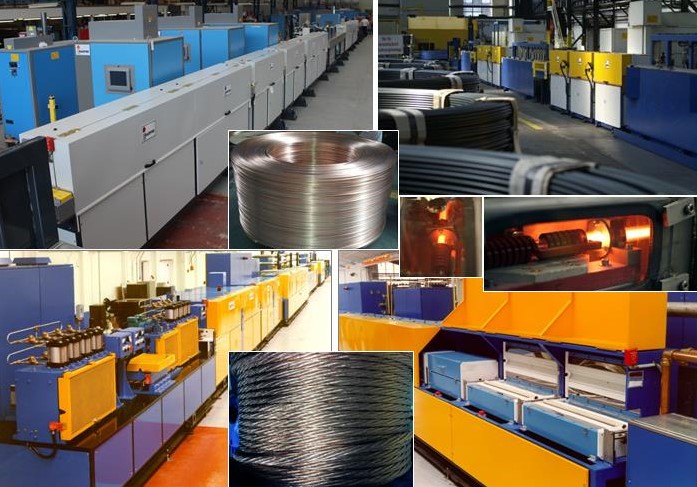
As an example, Figure 1 shows a number of continuous in-line multi-coil systems for induction heat treating wire products.²

Several continuous in-line systems for heat treating wire products (Courtesy of Radyne Corp., and Inductotherm Heating & Welding, UK. Both are Inductotherm Group companies.)

There are noticeable benefits of compact induction systems compared to fluidized beds, infrared heaters, and gas furnaces, such as quick response and the ability to provide a rapid change in the process operating parameters to accommodate the required temperature of the wire/cable being processed at speeds up to 5 mps. Frequencies that are in the range of 10 to 800 kHz are commonly applied. A dual-frequency concept can be beneficial to enhance electrical efficiency of while heating different diameters/thicknesses or it can be advantageous for through heating of metallic alloys that exhibit low toughness/high brittleness.

According to the dual-frequency concept, a lower frequency is used during the initial heating stage when the steel is magnetic. In the final heating stage, when the steel becomes nonmagnetic with significantly increased current penetration depth δsteel and becomes substantially more ductile, it is beneficial to use a higher frequency.

Case study¹:

As an example, consider the induction heating of a 1/8 inch-diameter (3.2 mm-diameter) steel rod from ambient to 2000°F (1100°C) using both a single 10-kHz frequency and dual 10-kHz/200-kHz frequencies (see Figure 2). When using the single frequency of 10 kHz (Figure 2, left), the rod’s final temperature experiences very little change regardless of the coil power that is increased more than fivefold (from 17 to 90 kW). The only noticeable difference is related to the initial slope of the temperature-time curve, where the steel is ferromagnetic. Upon reaching the Curie point, there is no noticeable temperature rise. This is the result of severe eddy current cancellation making the steel rod transparent (practically speaking) to the electromagnetic field of the induction coil.

Illustration of the dual-frequency concept when induction heating a 1/8 inch-diameter (3.2 mm-diameter) carbon steel rod from room temperature to 2012°F (1100°C) using both a single frequency of 10 kHz (a) and dual frequencies of 10 kHz/200 kHz (b). (Source: V.Rudnev, Systematic analysis of induction coil failures, Part 11c: Frequency selection, Heat Treating Progress, January/February, ASM Intl., 2008, pp. 27–29.)

In contrast, Figure 2, right, shows that a dual-frequency approach provides a remarkable improvement in the ability to heat the rod above the Curie temperature. A power of 14 kW/10 kHz was used to heat the rod below the Curie point and a power of 19 kW/200 kHz was used above it. The total required power is only 33 kW, compared with 90 kW using just 10 kHz, which was still unable to provide the required temperature rise.

Note: The target temperature of 2000°F (1100°C) is above typical target temperatures when hardening plain carbon or low alloy steels and it is more suitable for hot forming applications. This temperature was selected here to better illustrate a dual-frequency concept and the importance of avoiding eddy current cancellation when choosing operating electrical frequencies. It should be noted though that it is not unusual that the heat treating protocols/recipes for some alloyed steels and stainless steels may require target temperatures of 1900°F to 2100°F (1050°C to 1150°C) range.

In some not too often cases, three frequencies may be used. Lower frequency is applied for preheating inductors, a medium frequency is used for mid-heat inductors, and a high frequency is used for final heat inductors.

Sometimes, it is required that the induction system should be able to heat a variety of sizes using a single frequency. In these cases, in order to provide efficient steel heating, it is necessary to choose a frequency that will guarantee that the “diameter-to-current penetration depth (δsteel)” ratio exceeds 3.6 for any workpiece diameter or heating stage. Thus, it is important to remember that when calculating δsteel, the values of electrical resistivity and relative magnetic permeability of the heated material should correspond to their values at the highest temperature that occurs during the entire heating cycle.

The next installment of this column will review a variety of styles of inductors used in continuous and progressive induction hardening applications.


References

  1. V.Rudnev, D.Loveless, R.Cook, Handbook of Induction Heating, 2nd Edition, CRC Press, 2017.
  2. J.Mortimer, V.Rudnev, D.Clowes, B.Shaw, “Intricacies of Induction Heating of Wires, Rods, Ropes, and Cables”, Wire Forming, Winter, 2019, p.46-50

Dr. Valery Rudnev, FASM, IFHTSE Fellow, is the Director of Science & Technology, Inductoheat Inc., and a co-author of Handbook of Induction Heating (2nd ed.), along with Don Loveless and Raymond L. Cook. The Handbook of Induction Heating, 2nd ed., is published by CRC Press. For more information click here.

Dr. Valery Rudnev on . . . Equipment Selection for Induction Hardening: Continuous and Progressive Hardening, Part 2 Read More »

Dr. Valery Rudnev on . . . Equipment Selection for Induction Hardening: Continuous & Progressive Hardening, Part 1

This article continues the ongoing discussion on Equipment Selection for Induction Hardening by Dr. Valery Rudnev, FASM, IFHTSE Fellow. Previously, Dr. Rudnev reviewed equipment selection for scan hardening in three parts. This first installment in a new sub-series addresses equipment selection for continuous and progressive hardening. The second part in this series on equipment selection for continuous and progressive hardening is here; the third part is here. To see the earlier articles in the Induction Hardening series at Heat Treat Today as well as other news about Dr. Rudnev, click here


Introduction

The hardening of steels, cast irons, and P/M materials represent the most popular application of induction heat treatment. There are four primary methods for induction hardening [1]:

  • Scan hardening,
  • Continuous and progressive hardening,
  • Static hardening, and
  • Single-shot hardening.

These methods are related to the heating mode, essentials of inductor design, part geometry, and processing specifics. The previous three installments of this column, “Dr. Valery Rudnev on …”, discussed select subtleties associated with induction scan hardening. This article is devoted to continuous and progressive induction hardening techniques.

Continuous and Progressive Hardening

This method is commonly applied when heat treating elongated workpieces, such as bars, tubes, rods, wires, plates, beams, pins, and others. Long parts are more readily processed in a horizontal manner and heated as they progressively pass through multiple inductors. Inductors are positioned in-line or side by side. Each inductor may have a different design and power/frequency setting. This type of hardening is not limited to horizontally processed parts; vertical processing and arrangements at certain angles are also possible, if suitable.

There are also cases when a workpiece is statically heated to a certain temperature and then progressively moved to another heating position or static inductor for the next heating stage. These processes are referred to as progressive processing/heat treatment.

Induction practitioners sometimes consider continuous or progressive horizontal hardening systems as horizontal scanners. The difference is vague and it is a matter of terminology. Some heat treaters feel that it would be appropriate to differentiate these systems based on the number of inductors included in the induction machine design. Horizontal systems consisting of a single inductor are commonly referred to as horizontal scanners. In contrast, if a system consists of two or more heat treat inductors, then it might be referred to as a continuous or progressive heat treat system.

With the continuous hardening method, the workpiece is moved in continuous motion through a number of in-line inductors. Multiturn solenoid coils and, to lesser a degree, channel-style inductors and split-return inductors are most typically used in continuous heat treating lines. As an example, Figure 1 shows a side view of a horizontally arranged continuous induction system consisting of three in-line coils. Each coil consists of three turns.

Figure 1

As another example, Figure 2 shows a top view of a continuous heat treating line that comprises four in-line hardening coils and a spray quench device positioned after the last inductor. Workpieces (e.g., bars, shafts, rods, pins, etc.) are processed end-to-end through the inductors in a continuous motion.

Figure 2

Progressive multi-stage hardening is used when multiple workpieces are moved (via a pusher, indexing mechanism, robot, walking beam, etc.) through a number of coils. Therefore, the entire component or its portions are sequentially heated (in a progressive manner) at certain predetermined heating stages inside the in-line horizontal (being more typical) induction heater or a multi-position horizontal or vertical heater where coils are positioned side by side.

Continuous or progressive hardening methods are typically used for through hardening of elongated or moderate-length parts processing end to end and, to a lesser degree, for surface hardening. Outside diameters for case hardening (surface hardening) usually vary from 1/2 in. (12 mm) to 4 in. (100 mm). In through hardening applications of solid cylinders, the diameters may be as small as 1/8 in. (3 mm).

It is possible to recognize three heating stages in through hardening applications [1]:

  1. Initial or magnetic stage,
  2. Interim stage, and
  3. Final heating stage.

Initial or magnetic stage. Temperatures anywhere within the workpiece are below the A2 critical temperature (Curie point); thus, the steel is ferromagnetic and the current penetration depth is typically quite small. Skin effect is fairly pronounced at this stage and the heat source distribution resembles a conventional exponential distribution. The maximum power density is located at the surface and sharply decreases toward subsurface and the core. Heat source generation is localized by the fine surface layer of the workpiece. This leads to a rapid increase in temperature at the surface with a minor change in the core. This stage is characterized by high electrical efficiency often reaching 90% or so.

Interim stage. During this stage, the austenized surface layer and near-surface area is heated above the A2 critical temperature; however, the internal region, having temperatures below the Curie point, retains its ferromagnetic properties. At this stage, the power density distribution along the radius has a unique non-exponential “wave-like” distribution, which is very different from the commonly assumed exponential distribution. The cause for this behavior has been explained in Ref.1.

Final heating stage. The thickness of the austenized surface layer that exhibits nonmagnetic properties becomes greater than the current penetration depth in hot steel at a given frequency, and the “wavelike” distribution disappears. The classical exponential power density distribution will then take place. As expected, heat source generation depth has increased dramatically compared to an initial stage resulting in a more in-depth heating effect. With time, the core temperature exceeds the Curie point and the entire cross section will be nonmagnetic.

In surface hardening applications, there are typically only the first two heating stages.

Depending on the application specifics, the same frequency may be used for various coils or process stages. In other cases, power levels and frequencies may vary at the different heating stages. The presence of above-described process stages makes a marked impact on a selection of process parameters and design of an induction system and will be discussed in the next installment of this column.

References

1. V. Rudnev, D. Loveless, R. Cook, Handbook of Induction Heating, 2nd Edition, CRC Press, 2017.


Dr. Valery Rudnev, FASM, IFHTSE Fellow, is the Director of Science & Technology, Inductoheat Inc., and a co-author of Handbook of Induction Heating (2nd ed.), along with Don Loveless and Raymond L. Cook. The Handbook of Induction Heating, 2nd ed., is published by CRC Press. For more information click here.

Dr. Valery Rudnev on . . . Equipment Selection for Induction Hardening: Continuous & Progressive Hardening, Part 1 Read More »

Good Design Practices Lengthen Induction Tooling Life


Source: Fluxtrol.com


Induction heat treaters know that proper coil design is crucial to increasing longevity, improving production quality, and cutting costs. The authors of this paper on Coil Design Techniques (C. Yakey, V. Nemkov, R. Goldstein, J. Jackowski) draw on an extensive library of published case histories in induction coil design and performance evaluations and provide their own case study of an automotive CVJ stem hardening coil in order to demonstrate how the elimination of failure points and application of improved design guidelines can result in increased coil lifetimes, even in an inductor that in some circumstances can have a short lifetime.

An excerpt:

 “The quality of an induction coil is a major determinant of the cost to produce induction heat treated components. Oftentimes, the difference between a well designed and manufactured inductor and a poor performing inductor is not readily apparent. However, a high-quality induction coil can lead to substantially lower component manufacturing costs and higher profitability for the induction heat treater.”

Read more: “Best Practice for Design and Manufacturing of Heat Treating Inductors”

Good Design Practices Lengthen Induction Tooling Life Read More »