Stephen Thompson

Air & Atmosphere Heat Treat Tips Part 4: Carbon Control

OC

Let’s discover new tricks and old tips on how to best serve air and atmosphere furnace systems. In this series, Heat Treat Today compiles top tips from experts around the industry for optimal furnace maintenance, inspection, combustion, data recording, testing, and more. Part 4, today's tips, examines carbon probes and carbon control. Look back to Part 1 here for tips on seals and leaks, Part 2 here for burners and combustion tips, and Part 3 here for data and record keeping tips.

This Technical Tuesday article is compiled from tips in Heat Treat Today's February Air & Atmosphere Furnace Systems print edition. If you have any tips of your own about air and atmosphere furnaces, our editors would be interested in sharing them online at www.heattreattoday.com. Email Bethany Leone at bethany@heattreattoday.com with your own ideas!


1. Slight Positive Pressures Are Best

Contact us with your Reader Feedback!

Atmosphere furnace pressure should be only slightly above ambient. The range should be between 0.25-0.35 inches water column. Higher pressures in multiple zone pusher furnaces will cause carbon control issues. High pressures in batch furnaces will cause high swings when doors and elevators move.

Source: AFC-Holcroft

#atmosphericpressure #furnacezones #batchfurnace #multizone

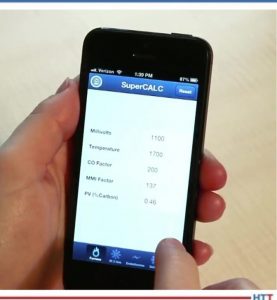
2. Carbon Probe Trouble Shooting

If you’re having atmosphere problems with a furnace that has been operating normally for some time, avoid the temptation to remove the carbon probe. There are several tests you can run on nearly all carbon probes while the probe is still in the furnace, at temperature, in a reducing atmosphere. Super Systems Inc. provides an 11-step diagnostic procedure in a white paper on their website, in a paper titled, “Carbon Sensor Troubleshooting” by Stephen Thompson.

Source: Super Systems Inc.

#troubleshoot #reducingatmosphere #diagnostictest

3. What To Do When Parts Are Light on Carbon

"Review process date for abnormalities."
Source: Super Systems Inc.

Many factors can contribute to why parts are not meeting the correct hardness readings. According to Super Systems Inc., here is a quick checklist of how to start narrowing down the culprit:

  • Review process data for abnormalities. The first thing to do is make sure the parts were exposed to the right recipe. Check the recorders to make sure the temperature prof le and atmosphere composition were correct. Make sure all fans and baffes were working correctly. Determine if any zones were out of scope and that quench times were acceptable. If any red flags appear, hunt down the culprit to see if it may have contributed to soft parts.
  • Check the generator. Next, check the generator to make sure it is producing the gas composition desired for the process. If available, check the recorders to make sure the gas composition was on target. If not, check the generator inputs and then the internal workings of the generator.
  • Check the furnace atmosphere. If the generator appears to be working correctly, the next step would be to check the furnace itself for atmosphere leaks. Depending on what type of furnace you have, common leak points will vary; for continuous furnaces, common leak points are a door, fan, T/C, or atmosphere inlet seals. Other sources of atmosphere contamination may be leaking water cooling lines in water-cooled jackets or water-cooled bearings. More than likely, if the generator is providing the correct atmosphere but parts are still soft, there is a leak into the furnace. This will often be accompanied by discolored parts.
  • Check carbon controller to make sure it matches furnace atmosphere reading (verify probe accuracy and adjust carbon controller). This can be done using a number of different methods: dew point, shim stock, carbon bar, three gas analysis, coil (resistance), etc. Each of these methods provides a verification of the furnace atmosphere which can be compared to the reading on the carbon controller. If the atmosphere on the carbon controller is higher than the reading on the alternate atmosphere check, that would indicate the amount of carbon available to the parts is not as perceived. The COF/PF on the carbon controller should be modified to adjust the carbon controller reading to the appropriate carbon atmosphere. If the reading is way off, it may require the probe to be replaced.
  • Check the carbon probe.
  • Replace the probe – CALL SSI.

Source: Super Systems Inc.

#checklist #hardening #carbon #furnaceatmosphere #probes #controller


Find heat treating products and services when you search on Heat Treat Buyers Guide.com


Air & Atmosphere Heat Treat Tips Part 4: Carbon Control Read More »

Carbon Sensor Troubleshooting

Jim Oakes, Super Systems, Carbon Sensor Troubleshooting, Stephen Thompson

by Stephen Thompson – President – Super Systems, Inc.

There are several key components in all atmosphere control systems. When a difficulty arises, it is important to identify the cause with minimum effort and expended time. The procedure that follows is designed to aid in that process.

INTRODUCTION

The starting point for any troubleshooting procedure is to properly identify the symptom that necessitates it. The cause of the symptom can often be elicited by answering some preliminary questions. Is this a startup problem, or has the system been operating under control? If this is a startup problem, it is necessary to establish that all system components have been properly connected and configured for the application. If the system has been operating properly and there has been either a gradual or sudden change in the control performance, it may conceivably be a problem with the probe. In order to establish the correct performance of the carbon sensor, resist the temptation to remove the sensor from the furnace. All of the tests outlined here must be done while the sensor is located in the furnace, at temperature, and exposed to a reducing atmosphere. This procedure can be performed on the SSi Gold Probe and on most other manufacturers’ sensors. We strongly recommend that you call us at 800-666-4330 before you remove the probe.

NOTE: IF YOU HAVE ALREADY REPLACED THE PROBE AND THE PROBLEM PERSISTS…..THE PROBE MAY NOT BE THE PROBLEM!

PROCEDURE

Does a shim stock analysis, a 3-gas analysis (SSi PGA3000) or a dew point analysis (SSi DP2000) verify the indicated value from the probe? If the values are close to the same, the problem is not likely the Gold Probe. If the values are not similar, continue with the following steps:

  1. Verify that both mV and t/c cables between the sensor and the controller are clean and connected firmly to the Gold Probe and controller terminals. Verify polarity.
  2. Verify that the reference air supply is connected to the reference air fitting. This will be the fitting closest to you when you face the probe. It has been found that on occasion the reference air has been connected in error to the burn off fitting, causing low readings.
  3. Check that the reference air is flowing. Disconnect the air supply at the probe and submerge it in a cup of water. Bubbles verify the flow.
  4. Verify that no air is flowing into the burn off fitting by submerging the burn off tubing in a cup of water. (Flow can occur if the burn off air pump is subject to external vibration.)
  5. Leak test- this test can detect a cracked or broken substrate in your Gold Probe. Verify that reference air is flowing at 0.5 to 2.0 scfh. Turn off the reference air for one minute and read the Gold Probe output millivolts. Turn the reference air back on and note the change in mV. It should not display more than a 5 mV increase.
  6. Is the controller COF set to the proper value? This factor is referred to by other descriptions such as Process Factor, Furnace Factor, CO Factor, Circulation Factor, Calibration Factor, etc. The factor may require adjustment to eliminate any offset or discrepancy between the indicated carbon potential and the actual achieved result in the work pieces or shim stock.
  7. Do the sensor temperature and MV output as measured by an independent digital calibrator agree with the indicated values on the controller with one sensor and one t/c lead disconnected? If not, there is most likely a controller calibration problem or a cable problem.
  8. Does the Gold Probe mV signal return to within 1mV of it’s original value in 1 minute as measured by a digital VOM after it has been shorted for 5 seconds? If it does not, go to step 10.
  9. Probe impedance (resistance) test-this is one of several electrical tests that determine the electrical integrity and reliability of the Gold Probe. Some contemporary controllers can perform it. If yours does not, conduct this simple test: at process temperature, disconnect the controller cable at the Gold Probe mV output and measure the mV value with a VOM. Then shunt the signal with a 100 kilohm resistor. After 10 seconds, read the new mV value, divide the original value by the new value, subtract 1 from the result and multiply by the value of the shunt resistor (=100K). The calculated value is the sensor resistance in kilohms, which should be less than 25 kilohms.
  10. If the problem is not corrected by probe and/or furnace burnout as described in the Gold Probe Manual and your system manual, and the problem is a faulty probe, contact SSi at (800)666-4330 and describe your problem to our technician. You may then request a Returned Material Authorization for repair or replacement of your Gold Probe.
  11. WARNING- even though you suspect a faulty sensor, DO NOT remove your Gold Probe from a hot furnace at a rate faster than 2 inches per minute. Cool the sensor on an insulating medium to avoid thermal shock. This will prevent damage that is expensive to repair.

Author information:
Stephen Thompson
Super Systems Inc.
7205 Edington Drive, Cincinnati,  OH 45249
Phone: 513-772-0060
Fax: 513-772-9466
www.supersystems.com

Carbon Sensor Troubleshooting Read More »

Skip to content