Dan Szynal

Refractory Anchor Design: 3 Important Things You Need to Know

Dan Szynal,
VP of Engineering and Technical Service,
the Plibrico Company

A significant number of refractory lining failures can be traced to either faulty design or improper installation of the anchor system. The tips of anchors in particular need special consideration due to their exposure to the highest temperatures.

In this Technical Tuesday feature for Heat Treat Today, Dan Szynal, Vice President of Engineering and Technical Service for the Plibrico Company, a manufacturer of monolithic refractories, gives 3 important tips for refractory engineers and managers to use in achieving an improved anchor design.


It is estimated that up to 40% of refractory lining failures can be attributed to a problem with the design of the anchor system or improper installation. This is a significant number. When designing a refractory lining for an industrial application, anchor design becomes one of the most important factors in creating an improved lining that is supported properly. In particular, the tips of the anchors experience the highest temperatures because they are closest to the hot face and thus become an important consideration.

Anchors have several functions. They hold the refractory to the wall to keep it from falling in. They also prevent wall buckling due to the internal thermal stresses created by high temperatures. And, to a lesser degree, anchors can also help support the load of the refractory weight.

To create a monolithic refractory lining that is properly supported and maximizes service life, here are three important metallic anchor tips you need to know.

Anchor Types and Service Temperatures

Figure 1.0: Recommended anchor tip temperature limits for various common alloys

For refractory linings using metallic anchor systems, refractory engineers and designers almost always use Class III austenitic stainless-steel anchors of various qualities. The typical grades of stainless steel used are AISI 304, 309, and 310. These contain chromium and nickel to provide the best corrosion resistance and ductility at high temperatures. For some applications in which temperatures are more extreme and the use of ceramic tile anchors is not practical for various reasons, AISI 330 and even Inconel 601 is sometimes used. These anchors have higher nickel content for superior oxidation resistance and tensile strength at temperatures of 2000°F or higher. Inconel 601 gives the added advantage of good resistance to both carburization and sulfidation in extreme applications.


Industry Best Anchor Practices

Anchor sizing for a refractory lining depends on the refractory thickness and number of components. Some designers use the practice of sizing the anchor height to be 75-85% through the main dense castable or gunned lining. Other rules of thumb used in the industry dictate that the anchor tip should be no more than two inches from the hot face of the refractory for thicker lining designs greater than 6-7″.

For refractory applications, it is useful to know the temperature gradient through the refractory lining–from the hot face to the cold face–to choose the proper anchor size so that one doesn’t exceed the temperature limit of the alloy being used. To help calculate the correct temperatures at different points in the refractory lining, many industry professionals will use a heat loss calculator/estimator. By using a heat loss calculator/estimator, one can choose the proper anchor height by determining the anchor tip temperature it will experience. There are numerous heat loss applications that can estimate the cold face of a furnace lining given the input conditions of a thermal unit. As part of its value-added service as a refractory solutions provider, Plibrico Company, LLC, has a web-based heat loss application that gives a good estimation of the thermal gradient of the refractory lining from hot face to cold face to maximize anchor thermal performance.

Figure 2.0: Typical refractory anchor lining configuration

For example, look at figure 2.0. You can see a 9″ side wall of refractory lining using 6″ of a typical 60% alumina low-cement castable and 3″ of 2300°F lightweight insulating castable for an application operating at 2000°F with an ambient temperature of 80°F. For this application, we would select 309 SS or 310 SS metallic anchors because the intermediate temperature at about 80% of the main lining thickness is at about 1900°F. Although 304 SS anchors would be more cost effective and are most commonly used in the industry, the anchor tips would oxidize at this temperature and would essentially burn out.


A Word on Anchor Tips

Standard practice for several years now has been to allow for expansion of the anchor tines by covering the anchor tips with plastic caps, dipping them in a wax, or putting tape on them. Metallic anchors expand at about three times the rate of alumino-silicate refractories. The expansion material affixed to the anchor tips burns out at low temperature and allows the anchor space to expand without causing cracks in the refractory.

Best practices in metallic anchor design also must include anchor spacing. Greatly a function of the specific equipment and geometry size, refractory engineers must consider the specific installation area. For example, anchor spacing patterns will be different in a flat wall or roof as compared to a section that has a transition of geometry or a less critical area of a vessel.

Anchor spacing should be based on the features of each specific project, such as mechanical properties of the anchor, and the refractory lining as a function of the temperature. Refractory engineers will use these properties in mathematical models to help create the optimal anchor spacing pattern and plan.

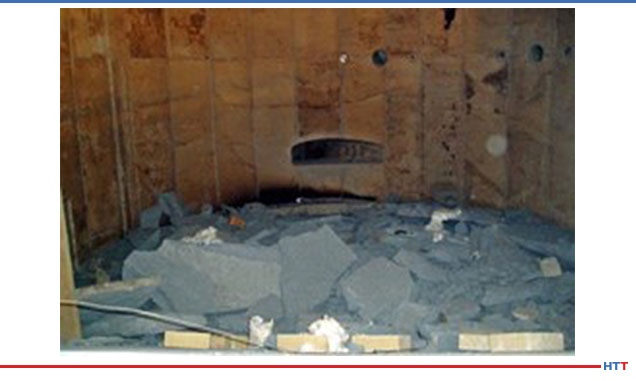
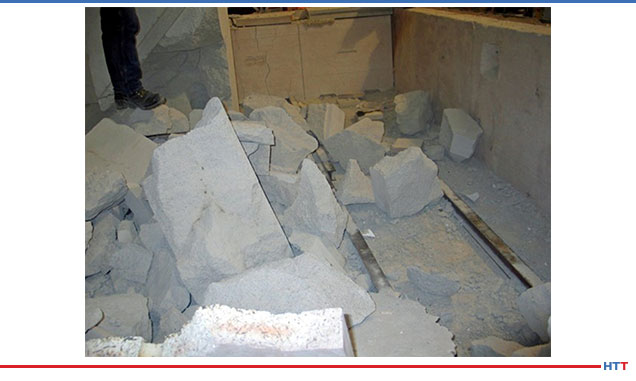
Often, failures commonly attributed to the refractory component can, in fact, be caused by deficiencies in the anchoring system. A strong anchoring system is key to maintaining monolithic refractory lining integrity, even when it is cracked, to prevent a total structural collapse.

To prevent vessel lining failures, increase service life, and maximize refractory performance, incorporate these metallic anchor tips. With these tips, it is possible to design and optimize an anchoring system that will work well with the demanding needs of refractory linings today.

For more information about metallic anchors and refractory anchoring systems, contact the Plibrico Company at contact@plibrico.com


Refractory Anchor Design: 3 Important Things You Need to Know Read More »

Safeguarding Refractory Installation: 12 Vital Steps to a Flawless Dry-Out

Dan Szynal, VP of Engineering & Technical Services, Plibrico

Installing new refractory materials is a necessary furnace maintenance practice which needs to be done periodically. But extended downtime and installation errors can be a major financial and operational headache. In this article, Dan Szynal, VP of Engineering & Technical Services, Plibrico, gives 12 factors which will ensure that the refractory installation is successful.


At 700°F, steam can exert 3,000 psi pressure.

During an initial dry-out, the powerful effects of superheated steam can cause explosive, devastating consequences to freshly cured refractory material. To that end, removing moisture from castable and precast shapes is a serious pursuit. The production pressures to minimize downtime can lead to shortcuts and rushed dry-out procedures. Usually, these sidesteps have the opposite effect, quickly compounding delays and costs by causing thermal damage to the linings and potentially incurring personal injury.

Dry-outs fail due to imprecise management of water extraction from refractories. At the boiling point of water, the pressure of steam is less than 1 psi. However, at 700°F, saturated steam reaches 3,000 psi, and possesses enough energy to disintegrate the most resilient refractories. Too much heat, rapid ramp-ups, vapor lock, poor curing, and surplus water can contribute to potentially hazardous situations.

Here are the 12 preventive factors to manage for dry-out safety and success:

1. Hot spots and flame impingement. Ensure that your burner flame is centered accurately. The direction of flame in the vessel must promote equal heating of all the refractory surfaces. A flame that impinges on a single area of the surface will quickly create a hot spot, forcing an unequal expansion of water vapor in that area and resulting in thermal spalling.

Thermocouples need to be monitored at both hot and cold areas to measure temperature consistency.

2. Temperature spikes. Insulation is ill-advised. Attempting to cover green castable with an insulating blanket can lead to destructive temperature spiking when the blanket is removed, breaks, or falls off. At a wall surface temperature of only 550°F, the removal of insulation exposes the surface to an extreme temperature shift which will activate unequal steam expansion and pressure.

3. Thermocouple placement and monitoring. Pay attention to the locations and readings of your TCs. Watching only the coldest location will allow the hottest area of your vessel to heat too quickly in the dry-out schedule. Conversely, monitoring only the hottest area will allow the colder area to retain more water than specified. This will lead to failure later in the schedule or during hold periods. At 700°F, steam can exert 3,000 psi pressure.

4. Air temperature vs. surface temperature. Thermocouples should report surface temperature. Air temperatures are typically 50°F to 100°F hotter, thus misreporting schedule impact. The initial hold period is typically designed to melt burn-out fibers. That creates important permeability. If the actual load temperature is lower than specified, permeability is not created, leading to failure in the next ramp-up period.

Pre-cast refractory requires longer bake-out schedules to release all water vapor.

5. Field vs. precast dry-out schedule. A field dry-out schedule is specified for single-sided heating. It precipitates a dual water migration, first (stage 1) towards the heat as the path of least resistance, but then reversing course (stage 2) and moving away from the heat, escaping towards the furnace shell. Field dry-outs are faster schedules than precast, where the pieces are heated from all sides simultaneously. The precast water migrates to the center of the piece, and that takes longer to escape. By misapplying the faster field dry-out to precast, there is a greater risk of water retention, which will ultimately lead to spalling, even at temperatures of 550°F or less.

6. Venting and air circulation. Proper venting is required to rid the furnace of water vapor during dry-out. Without vents and free air circulation, the steam is forced to exit via the furnace shell, which takes longer than the schedule would provide. Water will be retained closer to the shell side, increasing the likelihood for disintegration as temperature and steam pressure rise.

7. Surface coating. An impermeable coating on the refractory surface will prevent the stage 1 escape of water. Slowly, this water will be forced to move to its second exit, the furnace shell. This delay prepares the still-saturated refractory for failure at the next heat ramp-up.

8. Clear obstruction from weep holes. As stage 2 water migration occurs, it will escape to the furnace shell. There should be adequate weep hole capacity, cleared of obstructions which will allow the water to exit the furnace shell. These provide a release valve for buildup of steam pressure. Thermocouples need to be monitored at both hot and cold areas to measure temperature consistency. Pre-cast refractory requires longer bake-out schedules to release all water vapor.

9. Cold weather curing. In the curing process, simple hydrates form needle-like morphology. These structures promote permeability, and water/steam can more easily migrate through the refractory to escape. Curing in below-freezing temperatures alters the hydrates to be less permeable, thus trapping the water, even during dry-out and creating an inherent risk. As well, cold weather curing slows the required strengthening process, leading to a weaker refractory and likely spall. We have had a thermal operator tell us about a below-freezing cure that went badly: The water in the castable actually froze in place. When the dry-out was initiated, the castable melted and fell to the floor, where it subsequently cured and dried.

10. Cutting short cure time. Recommended dry-out schedules always assume a 24-hour equivalent curing time at moderate temperatures. By cutting short the cure time, water is retained, and strength is reduced. For example, a conventional castable requires 24 hours cure time; high cement/low moisture castable needs at least 16 hours. Adherence to product cure time specifications ensures optimum strength and a successful dry-out.

11. Free water removal without consideration. The goal of curing and dry-out is to create permeability in the refractory at lower temperatures (300°F) to enable water to escape. By quickly ramping up dry-out temperatures for the sake of time, permeability is diminished. At higher temperatures, (+500°F) steam pressure rises aggressively. Again, refractory composition drives curing and dry-out schedules, and as a rule, the faster temperatures rise beyond specification, the higher the risk of failure.

Pre-cast shapes spall at 550°F.

12. Refractory strength as a function of water content. A simple 1% excess of water will reduce refractory strength by as much as 20%. Overwatering by 1.5% cuts strength 25% to 40%. The implications are profound: the refractory will not withstand the steam pressures in dry-out, and worse yet, there is more water that must be extracted. A successful dry-out can be jeopardized by the slightest variance in water composition.

Conclusion

Meticulous care in refractory installation is the foundation to successful furnace operation. While no one looks forward to non-productive downtime, close adherence to product specifications, cure times, and dry-out schedules will ensure a more profitable return to operations. Managing the water issues in refractory composition is job one.

Safeguarding Refractory Installation: 12 Vital Steps to a Flawless Dry-Out Read More »

Conquering Aluminum Furnace Corundum: Effective Controls for Corundum Growth That Improve Quality and Cut Costs

Dan Szynal, VP of Engineering & Technical Services, Plibrico

Aluminum processors face constant challenges to their aluminum melt operations. Due to robust demand, processors often operate these furnaces at higher temperatures to maximize production rates. As a result, one of the costliest operational challenges is the aggressive formation of corundum deposits in their furnaces.

In this article, Dan Szynal, VP of Engineering & Technical Services, Plibrico, discusses the causes and concerns of corundum growth and outlines excessive, damaging, and costly corundum growth can be mitigated with the right refractory materials, coupled with the correct maintenance and watchful operation.


Root Causes of Corundum Growth


Corundum growth in a refractory lining of an aluminum furnace occurs due to a reaction between the alumina-silicate refractory and molten aluminum. Corundum formation can occur both externally and internally in the refractory lining.

There are four identifiable root causes that promote corundum growth:

  1. High temperature
  2. Presence of oxygen
  3. Alloy composition
  4. Use of fluxes and fluoride salts
Corundum Formation Illustration

High temperatures accelerate the reduction of oxides in the refractory. The higher the temperatures, the more quickly non-wetting agents lose their effectiveness. Aluminum begins to penetrate the refractory matrix because of decreases in aluminum viscosity and surface tension. Excessive furnace temperature can be the result of several causes: overfiring, improper furnace control, or inaccurate thermocouple placement. For example, a thermocouple that is recessed into the refractory lining by 2 inches may underreport temperatures by several hundred degrees.

Oxygen drives the reaction process in two ways: as an atmospheric gas, and as a reducible oxide in the refractory. Minimizing oxygen by controlling negative pressure sources such as doors, windows, and well openings reduces the potential for reaction. Proper flue sizing and burner stoichiometry also reduce excess oxygen and improve furnace energy efficiency.

Alloy composition can be a factor. Some aluminum alloys contain elements that reduce the silica as well as iron oxide, zinc oxide, and other oxides in refractories. Careful attention is necessary when choosing an appropriate refractory for more aggressive aluminum alloys to reduce the potential for reaction.

The use of fluxes and fluoride salts like cryolite Na3AlF6 in aluminum melting accelerate the reduction of oxides in the refractory. Their alkaline properties also reduce the local melt temperature of the refractory at the bellyband and then infiltrate the furnace lining. Over time, with a lack of regular maintenance, the corundum buildup will reduce furnace performance and increase aluminum loss.

Trouble Spots

The spread of corundum growth occurs most commonly in areas where its formation mechanisms of heat and oxygen are present. Typical problem areas include doors, openings, flue areas, and burner cones due to the potential for excess oxygen. Negative furnace pressure can also lead to leakage from the outside. Other common areas of formation include rear walls and bellyband areas where regular cleaning and maintenance are more difficult.

Control and Avoidance

The key to fighting corundum starts with choosing the proper refractory material for molten aluminum contact. The development of effective refractory additives that combat corundum, including non-wetting additives, dense oxide barrier formers, and pore-size reducers was pioneered by Plibrico, which includes these additives in products aimed at:

  • increasing wetting resistance and reducing the potential for oxidation-reduction of the refractory (The Plicast Al-Tuff® system)
  • forming a reactive layer to resist molten aluminum penetration up to 2000°F (Plibrico’s Al-Shield™ refractories)
  • offering good resistance to metal slag penetration, especially in higher temperatures, and adhering well to the existing refractory for repairs (Phos-bonded castables like Plibrico’s Exo-set Uno™)

In general, PliPartner refractory contractors tell us that they find phos-bonded plastic refractories to be excellent repair materials for aluminum processors. They are usually low in free silica and nonwetting. The material bonds chemically to existing refractory, making them easier to install, and phos-bonded plastic refractories are an excellent solution for corundum growth at the bellyband.

Best Practices That Will Help

A regular maintenance plan can go a long way to increasing refractory life; a schedule is essential. A knowledgeable refractory expert with genuine experience in aluminum heat processes can help with ideal schedules and checklists.

Corundum buildup is a common concern among aluminum furnace end users. Optimally, the longevity of a furnace lining depends on best practices in refractory materials and installation methods, knowing the past refractory performance history to evaluate future performance, managing expectations of furnace production output, and monitoring regular maintenance and operation of the furnace.

These factors are measurable key performance indicators that will help decision makers design and build good refractory linings for the demanding needs of aluminum producers today. Considering these factors and balancing them according to the producers’ needs can deliver a higher-quality product for longer life.


Conquering Aluminum Furnace Corundum: Effective Controls for Corundum Growth That Improve Quality and Cut Costs Read More »

Skip to content